Posts
Posts


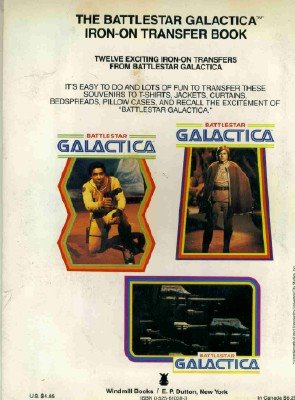
 So, you're in the fourth grade, it's 1979, and you want to look stylin'. What do you wear? Well - of course - you don your iron-on Battlestar Galactica T-shirt! You have twelve images to choose from, including a Cylon Basestar, a fleet of vipers, a Cylon raider, Apollo, Adama, Boomer, Starbuck and more.
So you get your Mom to iron on the image you want and you head proudly to school...
And then you get beat up for being a geek...
No, just kidding.
When I was a kid, way back in the bygone disco-decade, I remember lots of school kids wearing these "iron-on" shirts, meaning regular T-shirts emblazoned with the imagery of popular TV shows. It wasn't just Battlestar Galactica, either. I seem to remember a lot of kids wearing Welcome Back Kotter ("up your nose with a rubber hose!") and Fonzie ("sit on it!") iron-on shirts too.
If I were in the fourth grade today, I'd want a Veronica Mars iron-on T shirt with Kristen Bell on it. Heck, I'm thirty six and I want a Veronica Mars iron-on T shirt with Kristen Bell on it. Oops, did I say that out loud?
 Anyway...
This is how iron-on T shirts work:
"It's easy to do and lots of fun to transfer these souvenirs to T-shirts, jackets curtains (Mom will love that!), bedspreads, pillow cases..."/etc., read the instructions from Windmill Books/E.P. Dutton in New York. With just $4.95 (or 6.25, Canadian), you were on your way to iron-on bliss.
Why? Because "Colors come alive when ironed on!" Here are the specific directions:
1.) Use a clean, presssed shirt. For best results, apply to material made of 100% polyester , or at least 65% polyester blend, or 100% nylon. Cotton is not guaranteed to hold colors when washed.
2.) Put a piece of paper on the ironing board so colors from transfer will not come off on ironing board.
3.) Set iron between wool and cotton settings. Do not use steam.
4.) Place shirt
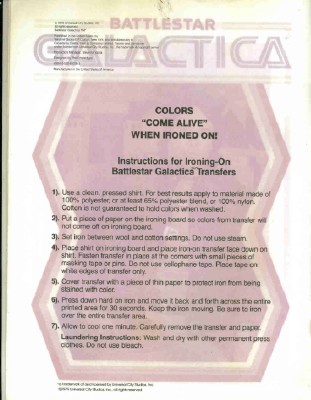 on ironing board and place iron-on transfer face down on shirt. Fasten transfer in place at the corners with small pieces of masking tape or pins. Do not use cellophane tape. Place tape on white edges of transfer only.
5.) Cover transfer with a piece of thin paper to protect iron from being stained with color.
6.) Press down hard on iron and move it back and forth across the entire printed area for 30 seconds. Keep the iron moving. Be sure to iron over the entire transfer area.
7.) Allow to cool one minute. Carefully remove the transfer and paper.
Ah, the 1970s. There was no better time to be a kid...














 Police on Screen